ProcessView Standard and Professional users can create special user properties called Classifications. Classifications are used to assign activities to a category or some logical grouping so that performance metrics may be summarized by category or group in the ProcessView Detailed analysis report Classifications worksheet.
Several examples of Classifications are Department, Phase, and Value Class.
To create a Classification, first, create a user property of type fixed list to describe the categories or groups within the Classification.
To build a user property of type fixed list, begin by accessing the Define Attributes button on the ProcessView toolbar and choosing the ‘Custom’ option.
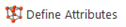
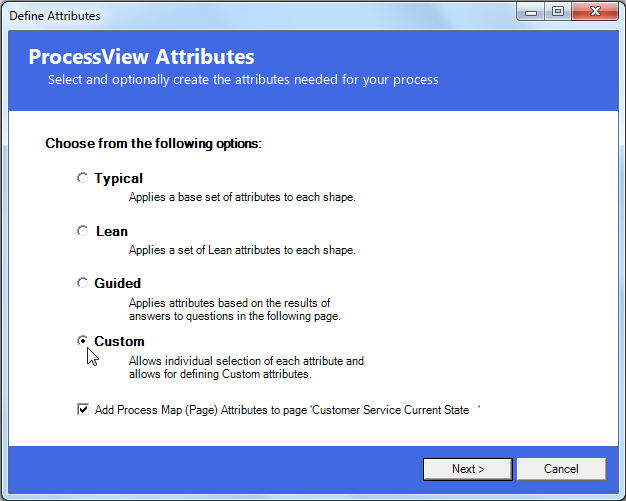
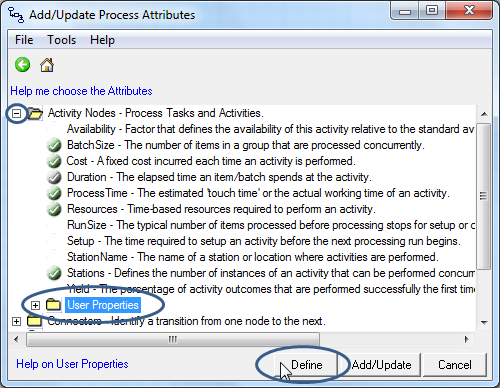
Note, if you are working in ProcessView version 1.0, simply click the Add/Update Attributes button shown below and select the first option in the Add/Update Attributes dialog, ‘Select attributes to be added to the Process Map’.

In the Define Attributes (or Add/Update Attributes) window, select the ‘+’ sign next to the Activity Nodes section, click the ‘User Properties’ folder icon and select the 'User Properties (or ‘Define’) button. (Note that this example will create the user property for Activity Nodes only. To add this property to Start Nodes and/or End Nodes, the same steps will be taken by expanding the Start Node and/or End Node groups in this dialog.)
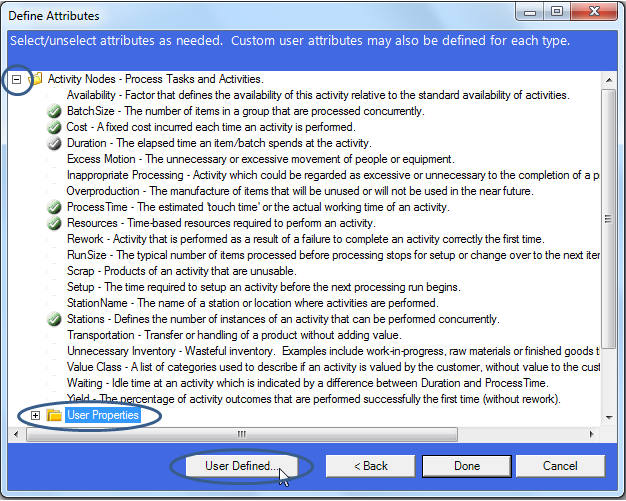
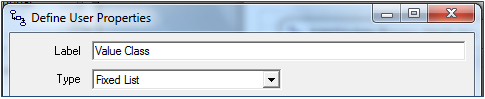
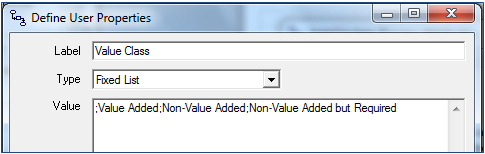
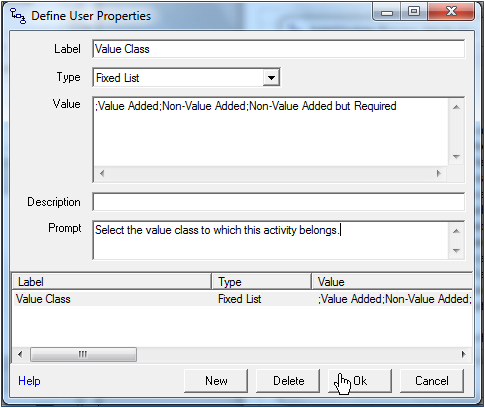
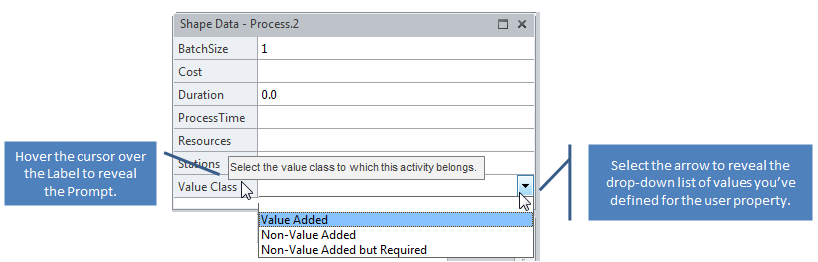
In the Define User Properties dialog, click ‘New’ to add a property to the list. Define a ‘Label’ to name the Classification and choose ‘Type’ fixed list. In this example, we will build a Classification called Value Class.
In the ‘Value’ field, list the categories of the Classification separated by a semicolon or with a carriage return (Enter). These values will be the list of items that the user may select from in the shape data window. To leave a blank option, begin the list with a semicolon or carriage return (Enter) in the value field as shown.
Optionally, add a ‘Prompt’ to appear as tool tip text for the user when they hover over the property in the shape data window. If desired, also add a ‘Description’ to appear in the Add/Update attributes dialog list next to the label. Once the Label, Type and Value fields are complete, click the Ok button to add the new user property to the Add/Update Attributes dialog list.
Once the Define Attributes (Add/Update Attributes) dialog reappears, note that the new user property is added to the user properties list for the selected shape type. If working in ProcessView version 2.0, click 'Done' in the Define Attributes window. (If working in ProcessView version 1.0, do not close the Add/Update Attributes window yet.)
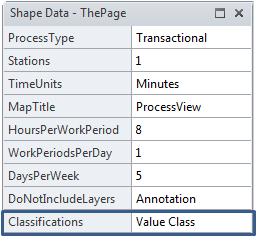
As this user property is textual data, ProcessView cannot perform any mathematical calculations with these values. To indicate that this is a special user property to be used for grouping, the Classification user property must be identified at the Page level.
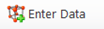
To do this in ProcessView version 2.0, click in the drawing canvas and select the Enter Data button on the ProcessView toolbar and navigate to the Classifications tab. Type the name of the User Property you’ve just created, and click Apply or OK.
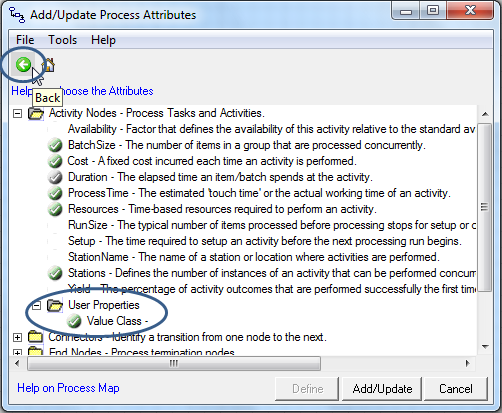
To do this in ProcessView version 1.0, click the ‘Back’ arrow in the Add/Update Attributes dialog and select the 2nd option in the list, ‘Assign Process Map (Page) Attributes Values’.
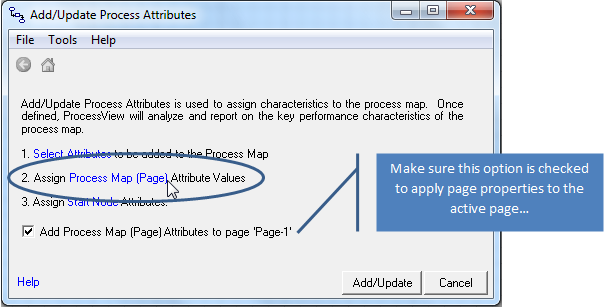
Navigate to the Classifications tab, enter the name of the User Property you’ve just created, and click ‘Add/Update’ to apply these new properties.

Once you've selected Done (or Add/Update Attributes), select an Activity Node in the ProcessView model and note the new user property has been added.
Click in the drawing canvas to reveal the Page properties shape data.
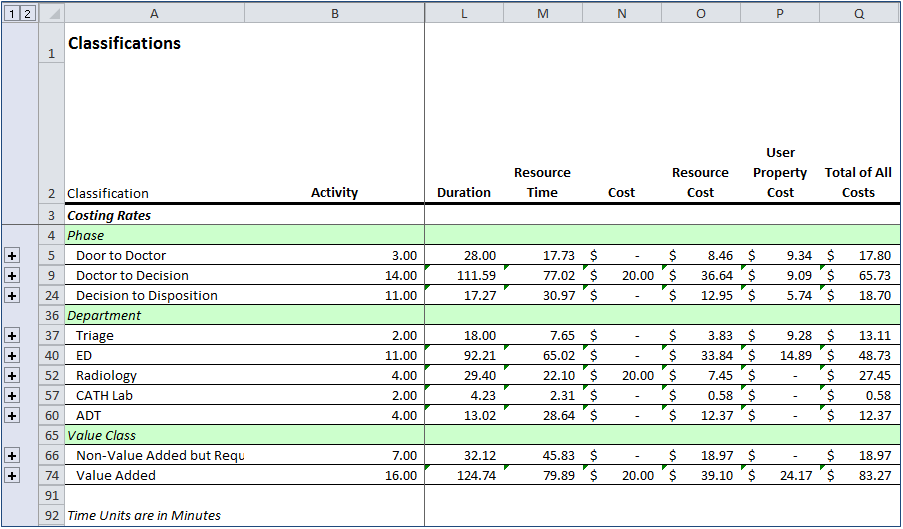
Once activities have been assigned values for the Classification user property, a Classification worksheet like that shown below can be obtained using the ProcessView Detailed analysis report option.